3 Common Makeup Mistakes: Corrected

With the deluge of makeup advice and methods that are out there, you’re bound to receive some unfavorable tips along the way. Perhaps you were misinformed or are just stuck in a bad habit, without even realizing it. While I may be a girly-girl and beauty lover at heart, my beauty advice on this blog is meant for the everyday girl who wants to keep things simple but feels like she could benefit from a few tips and tricks along the way.

Here are the corrections to three common mistakes or misconceptions about your beauty routine (more to come later)

#1 Test Foundation Shades on Your Neck, Not Your Cheek

foundation shades

Due to increased sun exposure and breakouts, your face often has a different pigment or slight discoloration from the rest of your body. Luckily, foundation helps to smooth out those imperfections and create a more flawless look. To make sure your face matches the rest of your body when using foundation, test different shades on the area of your neck directly under your chin. This is an area where you should be blending out your foundation anyway, so that you don’t end up with the dreaded makeup-mask line.

Color-Matching-Bad


#2 Don’t Skip on Moisturizer because of Oily Skin

Now, if you’ve been paying attention, you know that I’ve already addressed this major misconception in my post here about why you should use grapeseed oil, even if you have oily skin. Having oily-prone skin myself, I was one of the people who had this idea completely backward. After all, it seems only logical that adding moisturizer to oily skin would only make it worse. The TRUTH is that, skipping on moisturizer actually dries out your skin and causes it to produce more oil! The way to help your oily skin is by using a toner morning and night, before your moisturizer. A couple of all-natural toners are green tea or an apple cider vinegar + water mixture.

#3 Don’t Apply Bronzer to Your Entire Face

While bronzer is one of those holy grail products that every girl should own, it can go horribly wrong when used incorrectly. One of those times is when it is applied to the entire face, and you end up with a fake, orange, oompa-loompa look…not pretty.
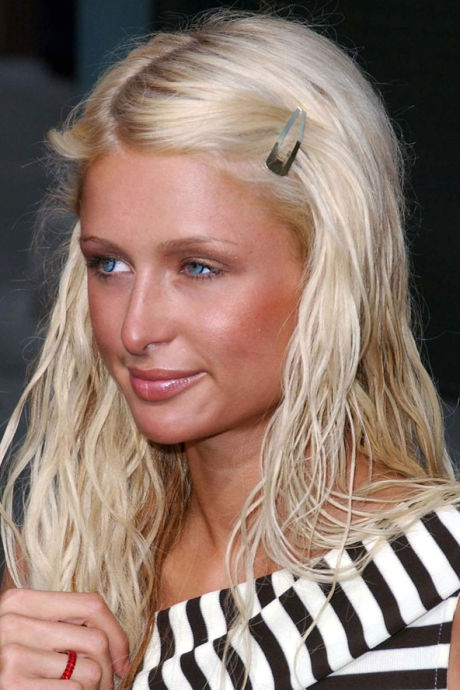
paris hilton

Oh, Paris…

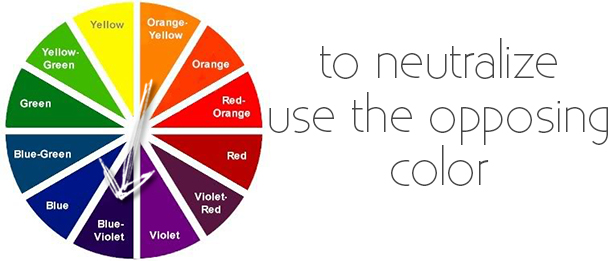
Bronzer should be used to add color and dimension to the face, rather than create one solid tan tone. There are a couple of easy rules to stick with here.

  • Use a bronzer that is only a shade or two (max) darker than your natural skin
  • There are two types of bronzer, and the type determines how to use it:
    • Shimmery – use this to the emphasize the areas of your face where sunlight would naturally hit – apply around temple area, on cheekbones, and down the bridge of your nose to achieve a natural glow
    • Matte – often used to contour the face (ahh the dreaded contour!), the easiest way is to apply to the forehead by your hairline, down your temples, under your cheekbone, and across your jawline, blending well

See, that wasn’t too tough, right?! Just a little summer refresher on those makeup skills!

At-Home Solution to Add Volume to Your Lashes

If you’ve been keeping up with the blog, you know that I’m a huge advocate of cheap, at-home solutions to enhance the beauty features that we all want. LONG, FULL LASHES. Who would not want bigger eyelashes?! If you’ve ever applied fake lashes for a special occasion or when getting your makeup done as a bridesmaid, you know there’s some *magic* there. It’s surprising how much additional, longer lashes can change one’s appearance. In fact, I would argue that eyelashes are the single most impactful feature on a woman’s face. If you could only keep one product from your makeup bag, what would it be? For me, it’s hands-down mascara.

So when I heard about this simple little trick, using a product I had in my bathroom drawer, I had to know.

baby powderBaby powder.

“The science”: after one coat of mascara, the baby powder sticks to your lashes, plumping them up and adding volume. You then cover with one more coat of mascara.

While it really is that easy, there are some pointers to keep in mind, which I’ll cover below.

Continue reading

Your $8 Ticket to Younger, Healthier Skin

As the song goes, beans have been called the magical fruit (“Beans, beans, the magical fruit, the more you eat, the more you…”), however, I’m going with grapes as the magical fruit. Grapes are a part of my every day — whether it’s my afternoon snack, my fermented evening drink, or slathering them all over my face before bed.

fermented grapes

No, I’m not actually suggesting that you soak your face in crushed grapes…rather grapeseed oil. Don’t stop reading if you’re an oily-skinned girl like me, because I promise this is not like the “oil” you are thinking. I first got the idea to use grapeseed oil as a moisturizer from the aesthetician who was giving me a facial about a year ago. She claimed it was the only moisturizer she used on her (flawless) face and had amazing benefits. She ranked high on the hippie-scale, incorporating as many natural products as possible into her daily life. I definitely wasn’t sold on the idea at first, but began thinking more about how much it did make sense to use something on my body that came naturally from the earth, rather than from a chemical lab. Plus, a big bottle at the natural products store was $8, so what was there to lose? A year later, I’m a firm believer in the stuff.

Continue reading

5 Secrets of Styling Curly Hair

curls

I’m sure many of you have noticed the recent curl-revolution, of sorts, between Dove’s ‘Love Your Curls’ commercials, and the ‘Curl Power’ campaign segment on the Today show. The overall message is for girls with naturally curly hair to embrace and love their hair for what it is, in a straightener-dependent society. I don’t know when we all started following the man(or woman)-written belief that straight hair looked better, but I can recall myself taking on this trend in 7th grade (15 years ago). But before the straightening iron, clamping the curling iron at your roots and tugging downward through your strands didn’t exactly give you a sleek style.

My family has always preferred my curly hair, but it wasn’t until multiple boyfriends and friends told me how much they liked my natural texture that I decided that MAYBE I could pull it off. Especially in the past few years I’ve really embraced my natural curls and now wear it this way about 75% of the time. Letting it go free and curly definitely has its benefits too, including healthier hair without the heat damage and saving loads of time.

I’m going to share with you today the tips and tricks I’ve learned to keep my curls from going straight 80s perm style (boy would I have fit in back then). Continue reading

Purple Shampoo 101:

brass-bustere57dbf1c2fcc0906ad26e1a9e4a02712

If you have either (a) naturally gorgeous hair color, or (b) the willpower to not indulge at the salon, you don’t know that disappointing feeling of looking in the mirror and realizing that the $100+ hair color you paid for a few weeks ago has, well….changed color. Any time you lighten (or lift) your hair color, it has a natural tendency to fade into warmer shades and, oftentimes, that dreaded brassy color. While some beauties can pull off those warm and rich golden tones, it certainly isn’t a good look on me. To combat those brassy, orange-ish colors, your hair stylist uses a colored toner at the salon to achieve the desired shade. Once this toner fades over a certain number of washes, it’s back to the salon for another $30-40 toner sesh.

I really hadn’t put much thought into this after not coloring my hair at all for seven years, until about two weeks ago, when I hit ultimate boredom with my appearance and decided to take the plunge. Pinterest also fueled the fire by introducing me to the more recently seen “ashy brown” color that I had to have (refer to pics). I’m a researcher at heart, and I don’t take a big decision, including my hair color, lightly. My ashy brown searches led me to what seemed like a miracle product! Purple shampoo? This is a thing? I had never believed that a shampoo could actually change the color of your hair, since they’re all just marketing ploys anyway – right? If you refer to my handy-dandy color wheel below, purple and deep purple are the exact opposite of yellow and orange, which is why they neutralize the gold/brass tones. While some of you might be a little skeptical of putting a color like purple on your hair and turning all Katy Perry, I assure you that a shampoo, used properly, doesn’t have that kind of power. By “neutralizing” the brassiness, I mean that it brings your hair color back toward the cool side of the color temperature spectrum, which is where I want to be.

colorwheel

While many of these shampoos advertise or even state on the bottle that they are used for blonde or gray hair, it can be just as beneficial for brunettes with lighter highlights. It’s recommended that you begin by using the purple shampoo every other time you shampoo, and then adjusting based on your own results. To combat higher levels of brassiness, you can use it every time you shampoo. If your color is getting too ashy, reduce your usage to every three or four shampoos. However, you should know that these shampoos tend to dry your hair out, so you should be using a moisturizing conditioner or mask paired with it. I personally use “it’s a 10 Miracle Deep Conditioner plus Keratin” and LOVE it. Also, feel free to mix a concoction of half purple shampoo and half of your regular shampoo to reap the benefits of both.

c9b8166fe30731f4fcf1eaa67ea5fbadshampoo pic

(note: picture is not my own hair)

I have been using Clairol Shimmer Lights, which I conveniently was able to find at my neighborhood Walgreens. Here are some other popular and tested brands that you can find online, in the hair care aisle, or at a beauty store or salon.

Sheer Blonde Tone-Correcting line by John Frieda
Blonda by Unite
Color Endure Violet by Joico
Happy at-home toning!
Images via and via